To sell only certain products to members on Shopify, add a customer tag to your members and set that product’s purchase eligibility in a purchase limits app to “only customers with the tag”. Shopify’s built-in sign-in requirement applies to every order in your store, so you can’t apply it to one product.
With the SellRules app for Shopify, you set two things for each product:
- Set purchase eligibility to “Tag required (specific tagged customers only)”
- Enter the tag you gave your members (for example, Member) in “Required tag name”
Anyone can view the product page. When a customer without the tag clicks “Add to cart”, the product doesn’t go into the cart and the message you wrote appears.
What your customers see
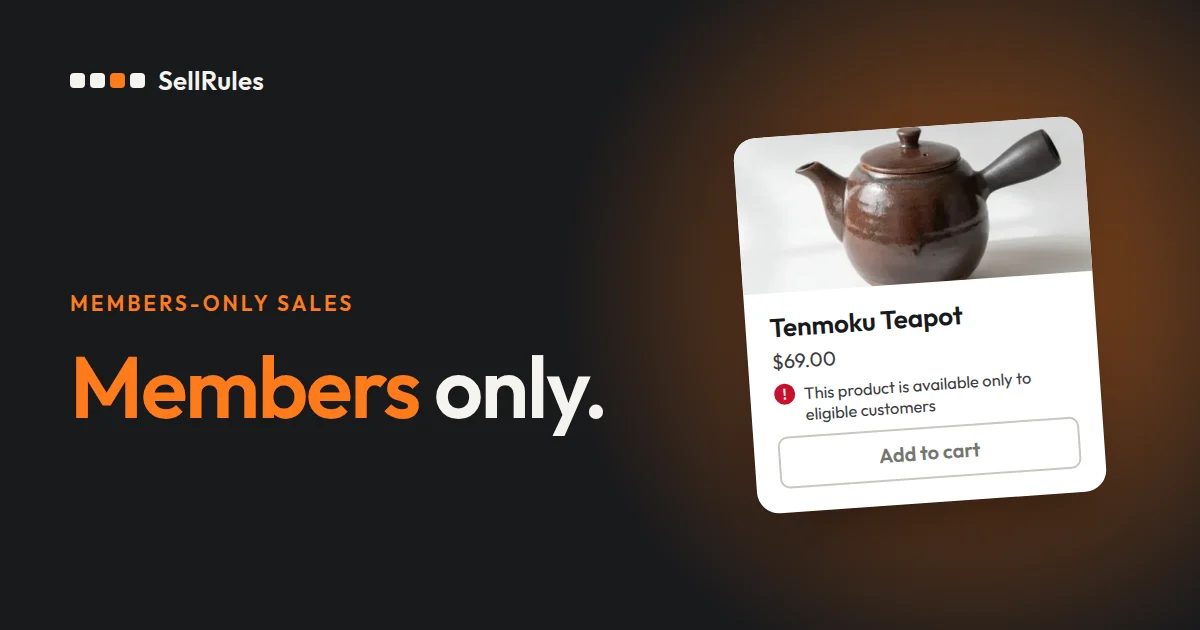
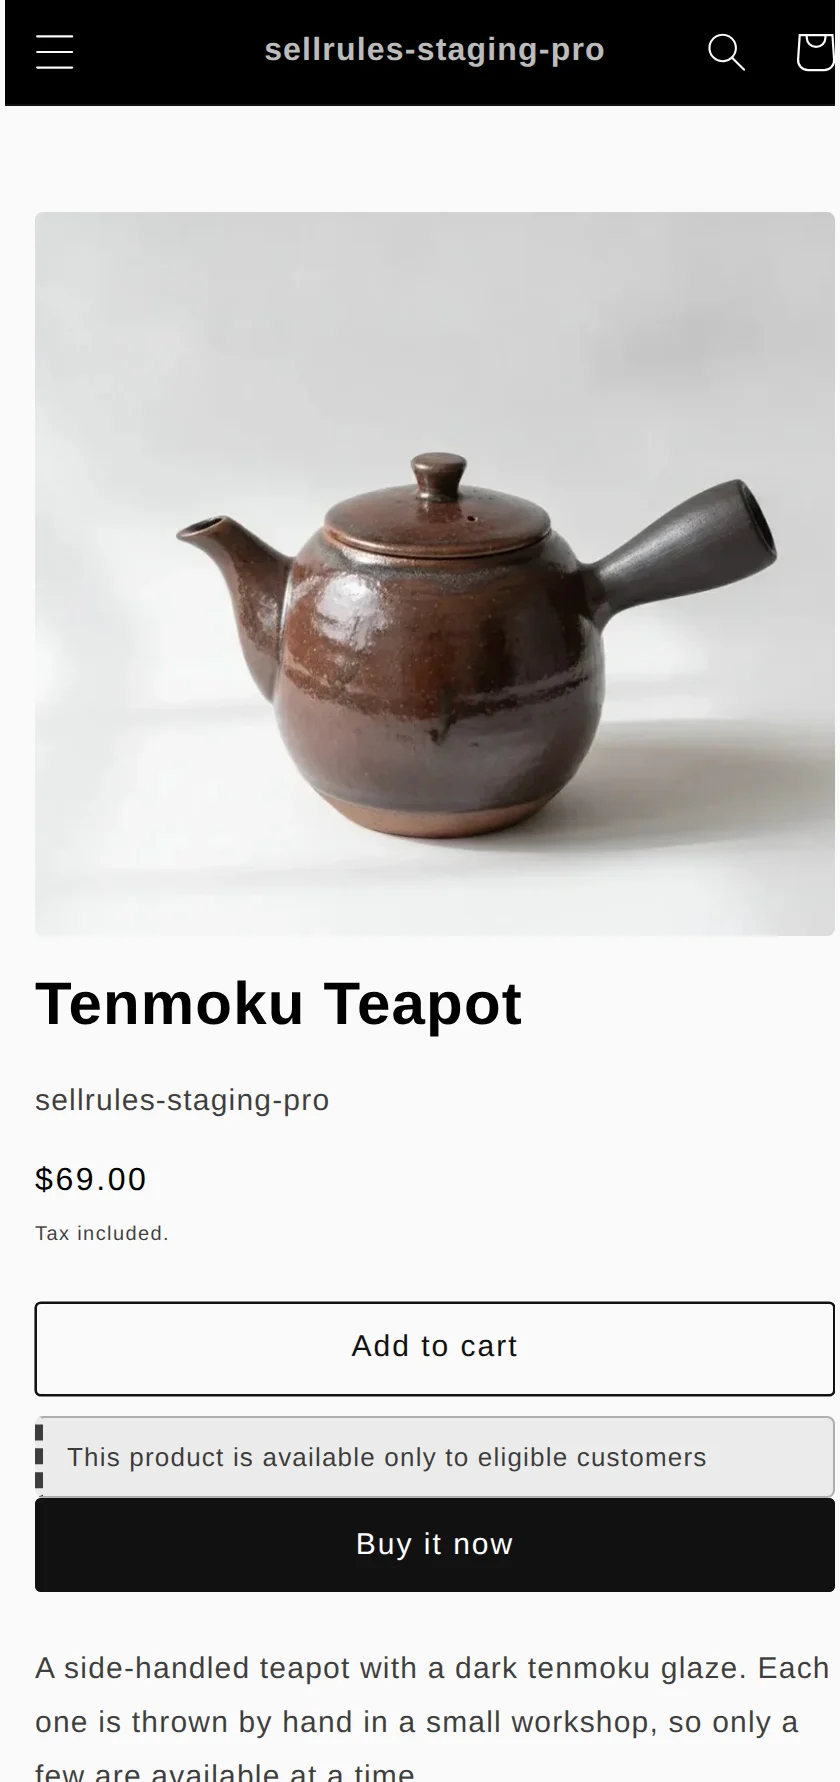
On the product page, the “Message shown to customers” appears below the buy button. The screenshot below is a product with that field left blank, so it shows the default message, “This product is available only to eligible customers”.
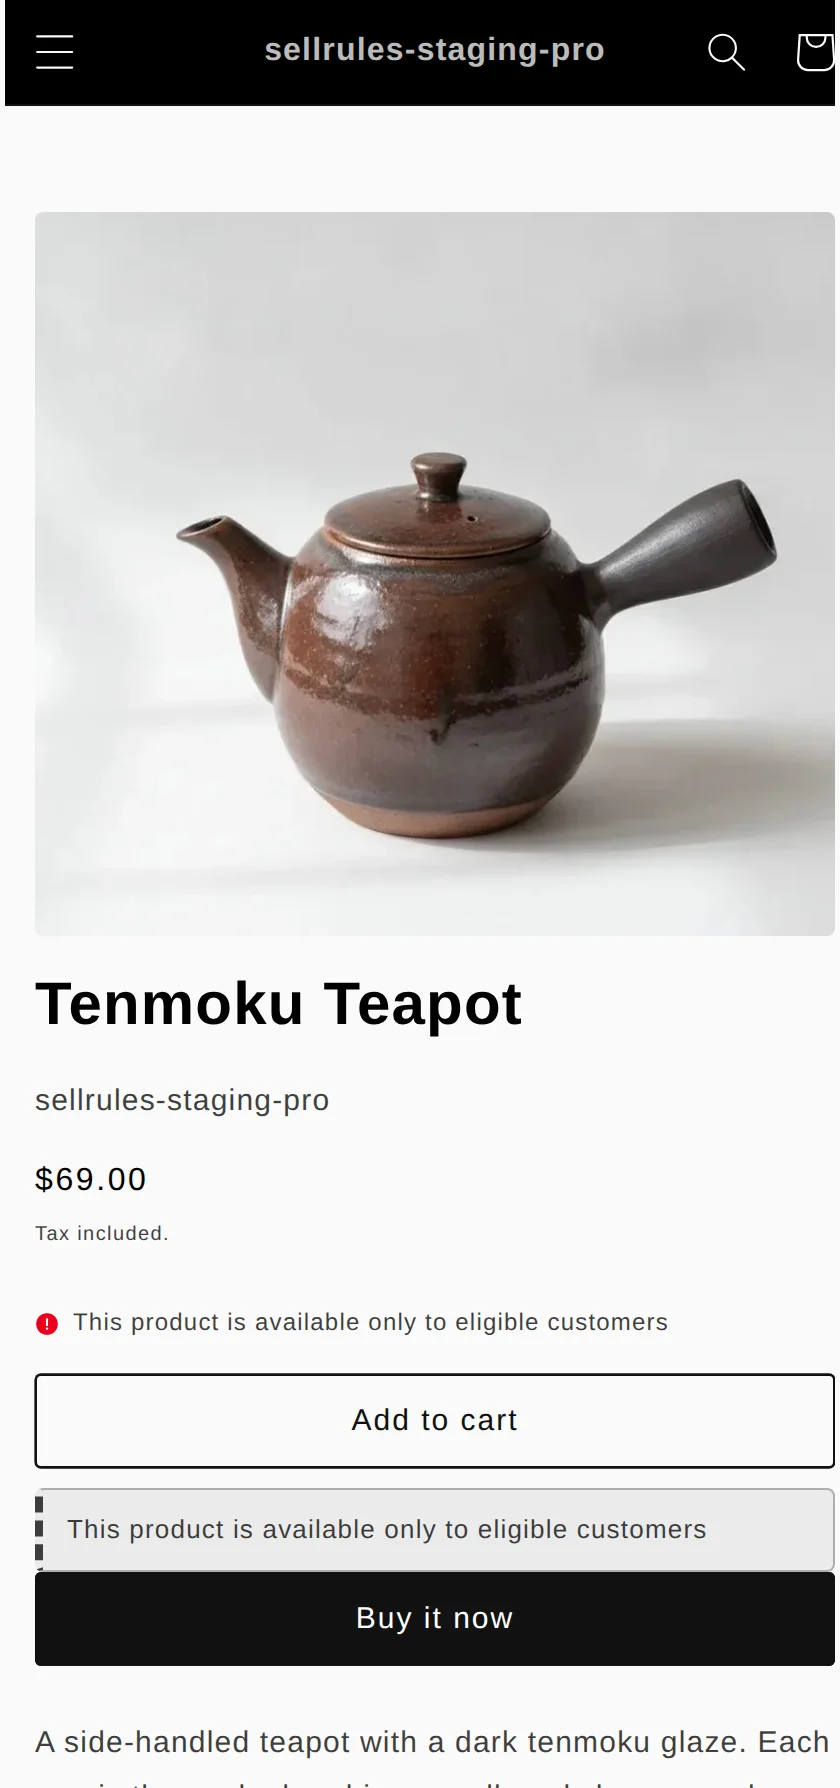
When a customer who isn’t signed in clicks “Add to cart”, the product doesn’t go into the cart, and the same message also appears below the quantity field.
Here is the result for each type of customer.
| Customer | Result |
|---|---|
| Not signed in | Stopped (the message appears) |
| Signed in, no tag | Stopped (the message appears) |
| Signed in, has the “Member” tag | Can order |
The message also appears on the product page for your members. So say both who can buy and that members should sign in before buying.
- “This product is for members only. If you’re a member, sign in with your registered email address, then add it to your cart.”
- “Through November 20, this product is an early release for customers who have bought from us before. General sales start November 21 at 10 a.m.”
The message can be up to 200 characters. The tag name itself is never shown to customers.
How this differs from Shopify’s sign-in requirement
Shopify’s sign-in requirement vs. SellRules Tag required
Shopify’s sign-in requirement
SellRules Tag required
Shopify has a setting that requires customers to sign in to a customer account before checkout (Shopify Help Center, checked November 12, 2026). You can’t choose it product by product, and it applies to checkout for every product in your store.
According to the same help page, with the sign-in requirement on, accelerated checkouts such as Apple Pay no longer appear in the cart. If you have just one members-only product, setting purchase eligibility product by product in SellRules leaves the way customers buy everything else in your store unchanged.
Adding a Shopify customer tag doesn’t stop a purchase by itself. SellRules compares the tags a customer has with the “Required tag name”, and makes that decision in the cart and at checkout.
Add a customer tag to your members
Before you create the rule, add a tag to your members. A rule takes only one tag, so even if you have several kinds of members, give everyone you want to be able to buy that product the same tag.
| How to add tags | Where |
|---|---|
| One customer at a time | The tags field on the customer’s details page |
| In bulk | Select customers in the customer list, then “Add tags” |
| From a member list | Import a customer CSV (the “Tags” column) |
Bulk tagging is covered in the Shopify Help Center article “Managing customers” (checked November 12, 2026).
If you choose “Overwrite existing customers that have the same email or phone number” when you import a CSV, those customers’ tags are replaced with what’s in the CSV too (Shopify Help Center, “Importing and exporting customer lists”, checked the same day).
Tags aren’t case-sensitive. SellRules also treats “VIP” and “vip” as the same tag.
Set it up in SellRules

Before you start, check that SellRules “Home” shows “Checkout limits are on”.
- In SellRules, open “Purchase limits & sold-out” → “Purchase limits”, click “Create rule”, select one product and click “Next”.
- For the target, choose “Whole product”, or “Specific variants” if only some colors or sizes should be restricted.
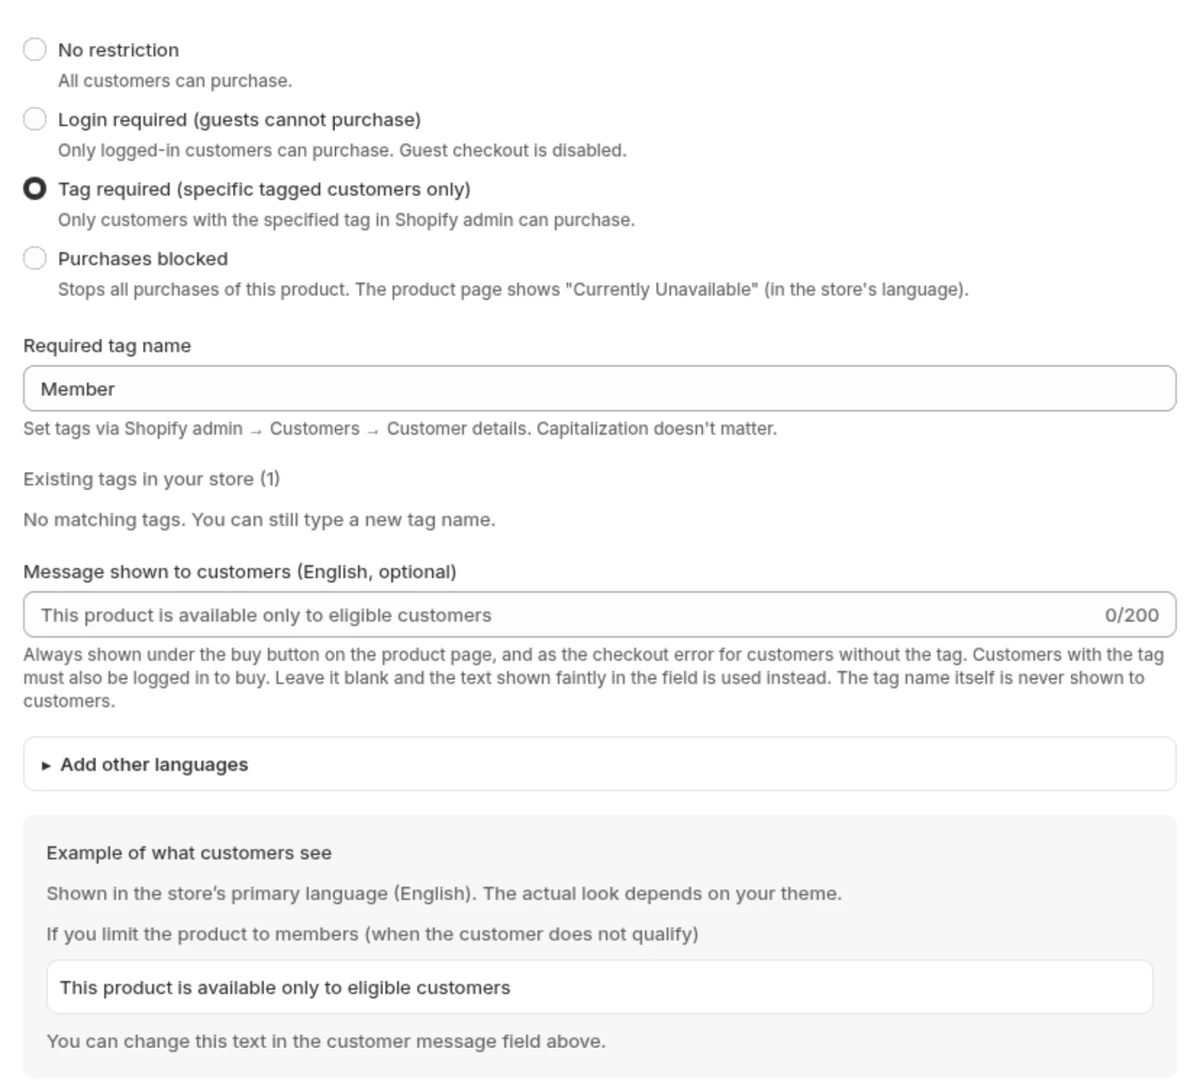
- Under purchase eligibility, choose “Tag required (specific tagged customers only)” and enter the tag you gave your members in “Required tag name”. Tags that already exist in your store appear as suggestions below the field.
- Enter the “Message shown to customers”. If you publish your store in other languages, use “Add other languages” to enter the message in those languages too.
- Click “Save”. It can take about 1 minute for the change to reach the product page, cart and checkout.
When you save the rule, SellRules automatically loads the tags of your existing customers. It loads up to 5,000 customers automatically, so if your store has more, click “Reload customer tags” once under “Customer tag loading” in “Settings” after saving.
Test it with a customer who can buy and one who can’t
Sign in to your store as a customer with your own email address and test in the order below. You don’t need to go as far as payment.
| What you try | What you should see |
|---|---|
| Sign out and click “Add to cart” | The message appears and nothing goes into the cart |
| Sign in to your own account without the tag and do the same | The message appears and nothing goes into the cart |
| Add the “Member” tag to your account, wait a little, and do the same | It goes into the cart and you can continue to checkout |
When you’re done, remove the tag from your own account.
If a member can’t buy, check in this order:
| Symptom | Cause | Fix |
|---|---|---|
| A customer with the tag is stopped | They’re signed in with a different email address | Ask them to sign in to the account you tagged |
| A customer with the tag is stopped | The tag name doesn’t match “Required tag name” | Make the names the same |
| Stopped right after you added the tag | The tags haven’t finished loading | Click “Reload customer tags” |
| No message on the product page | SellRules is off in the theme | Click “Open app embeds” on “Home”, turn it on and save |
End early access and switch to general sales
For an early release to your repeat customers, use “Tag required” only for the early period, and change purchase eligibility when general sales start.
| How you want to sell in general sales | What to change |
|---|---|
| Let anyone buy | Click “Disable” for the rule in the list |
| Let any signed-in customer buy | Change purchase eligibility to “Login required” |
A disabled rule stays in the list. For your next early release, click “Enable” and you can use the same tag and message again.
If you wrote the early-access dates in the message or the product description, update those too.
Pricing
Purchase limits are available on the Free plan for up to 1 product. Next, pick a product you want to sell to members, create the rule, and check it with your own account, both when it stops and when it goes through.
To make a second or further product members-only, switch to the Launch plan (US$7.99 per month), which has no limit on the number of products. You can install SellRules from the Shopify App Store, where you can also check the pricing and trial terms.
Frequently asked questions
Will a customer who leaves your membership still be able to buy?
No, once you remove their tag in Shopify. SellRules receives Shopify’s customer update notification, updates the tags it uses for matching, and stops their purchases from then on.
Related articles:
- Set a per-customer quantity: Setting a “limit one per customer” rule
- Choose how to sell, such as early access or limited quantities: Rules for early-access and limited sales
- When no message appears on the product page: What to check when buttons or messages don’t appear
The teapot and the message wording are examples for illustration.