To start pre-orders on Shopify, you use a pre-order app to give the product a schedule that sets when it starts taking pre-orders.
With the Shopify app SellRules, there are only 2 things you need to decide to get started:
- The pre-order start date (the date and time the product page button switches to “Pre-order Now”)
- What happens when the pre-order ends (switch to regular sales, end sales, or keep going with no deadline)
If you already know the ship date and how many you can take, you enter those on the same screen. Start with 1 product, check the product page and emails with a test order, and then roll it out to your other products.
What customers see
The 3 screenshots below show the product page of the same vase. Only the phase of the schedule is different.
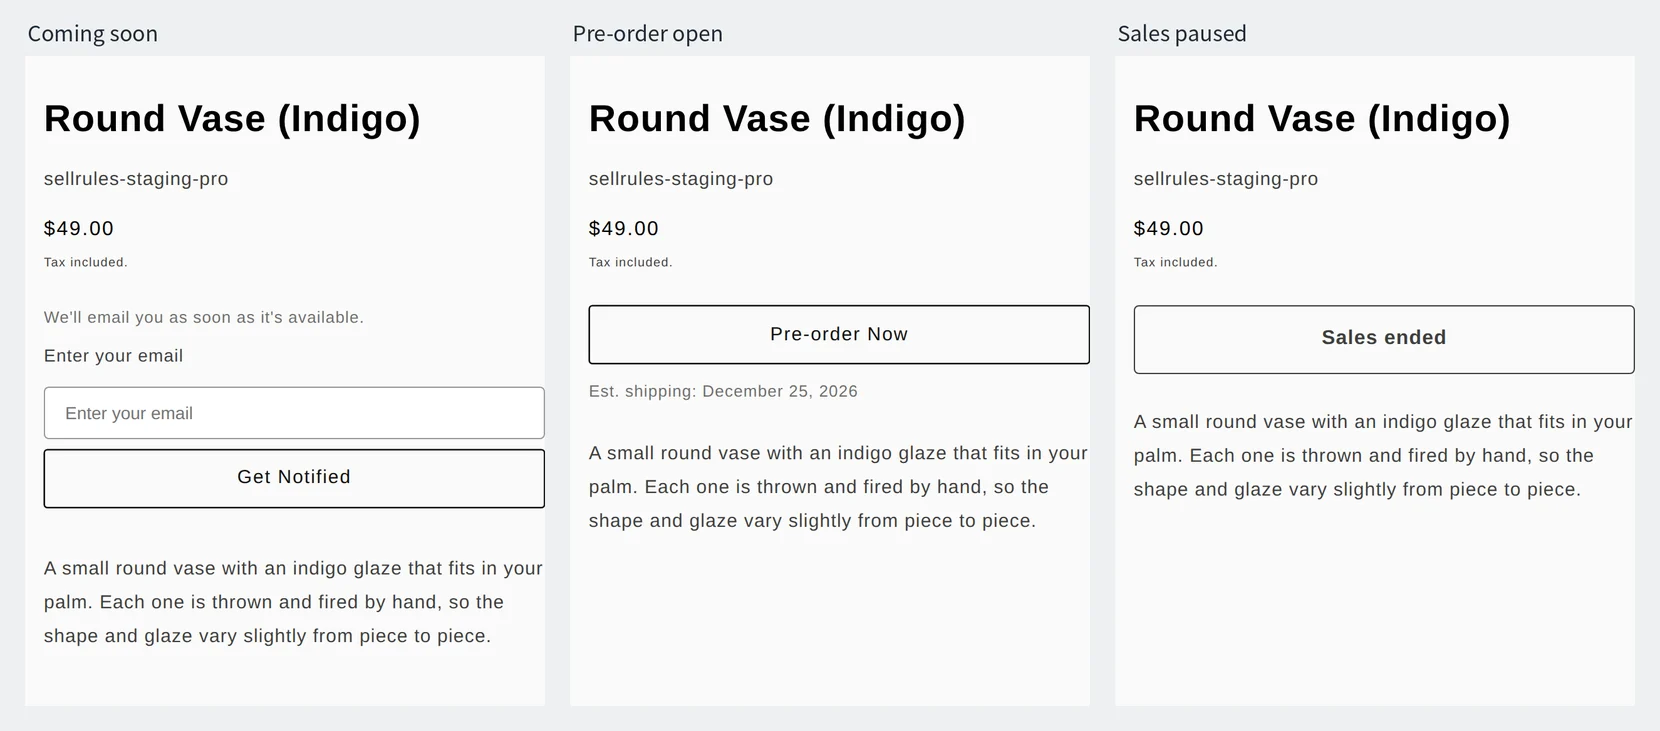
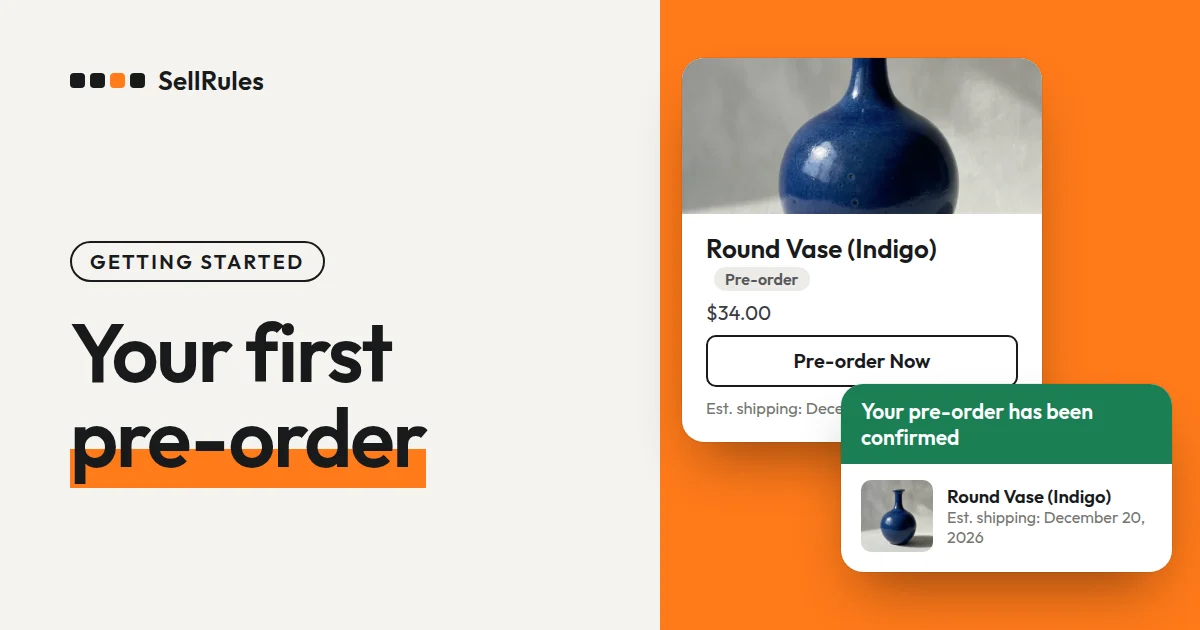
The middle one is the page while pre-orders are open. The buy button changes to “Pre-order Now”, and the timing you entered in “Estimated shipping (text)” appears below it, after “Est. shipping:”. Customers can see that the product is a pre-order and roughly when it will ship before they add it to the cart.
The left one is what you get when you add a “Coming-soon period” to collect email addresses before pre-orders open. The coming-soon period is optional. Without it, the product page stays as it normally is until the pre-order start date, and switches to the middle screen at the start time.
The right one is the page while sales are paused. If you chose to end sales under “When the pre-order ends”, the page also looks like this from the end date and time.
Here is what customers see and what gets sent at each phase.
| Phase | Buy button on the product page | What customers and you receive |
|---|---|---|
| Coming soon (optional) | “Get Notified” and an email field | At the pre-order start time, everyone who signed up gets an email with the subject “[Pre-order Now Available]” plus the product name |
| Pre-order open | “Pre-order Now” and the estimated shipping | The customer who ordered gets a confirmation email with a subject starting “[Pre-order Received]” |
| After the pre-order ends | Depends on the ending you chose (your theme's standard buy button, or a “Sales ended” button that can't be clicked) | Nothing (only the button changes) |
When customers add a pre-order product to the cart and buy it, they use Shopify's own cart and checkout as usual. As with any other order, they pay the full amount at purchase.
Shopify on its own vs. SellRules
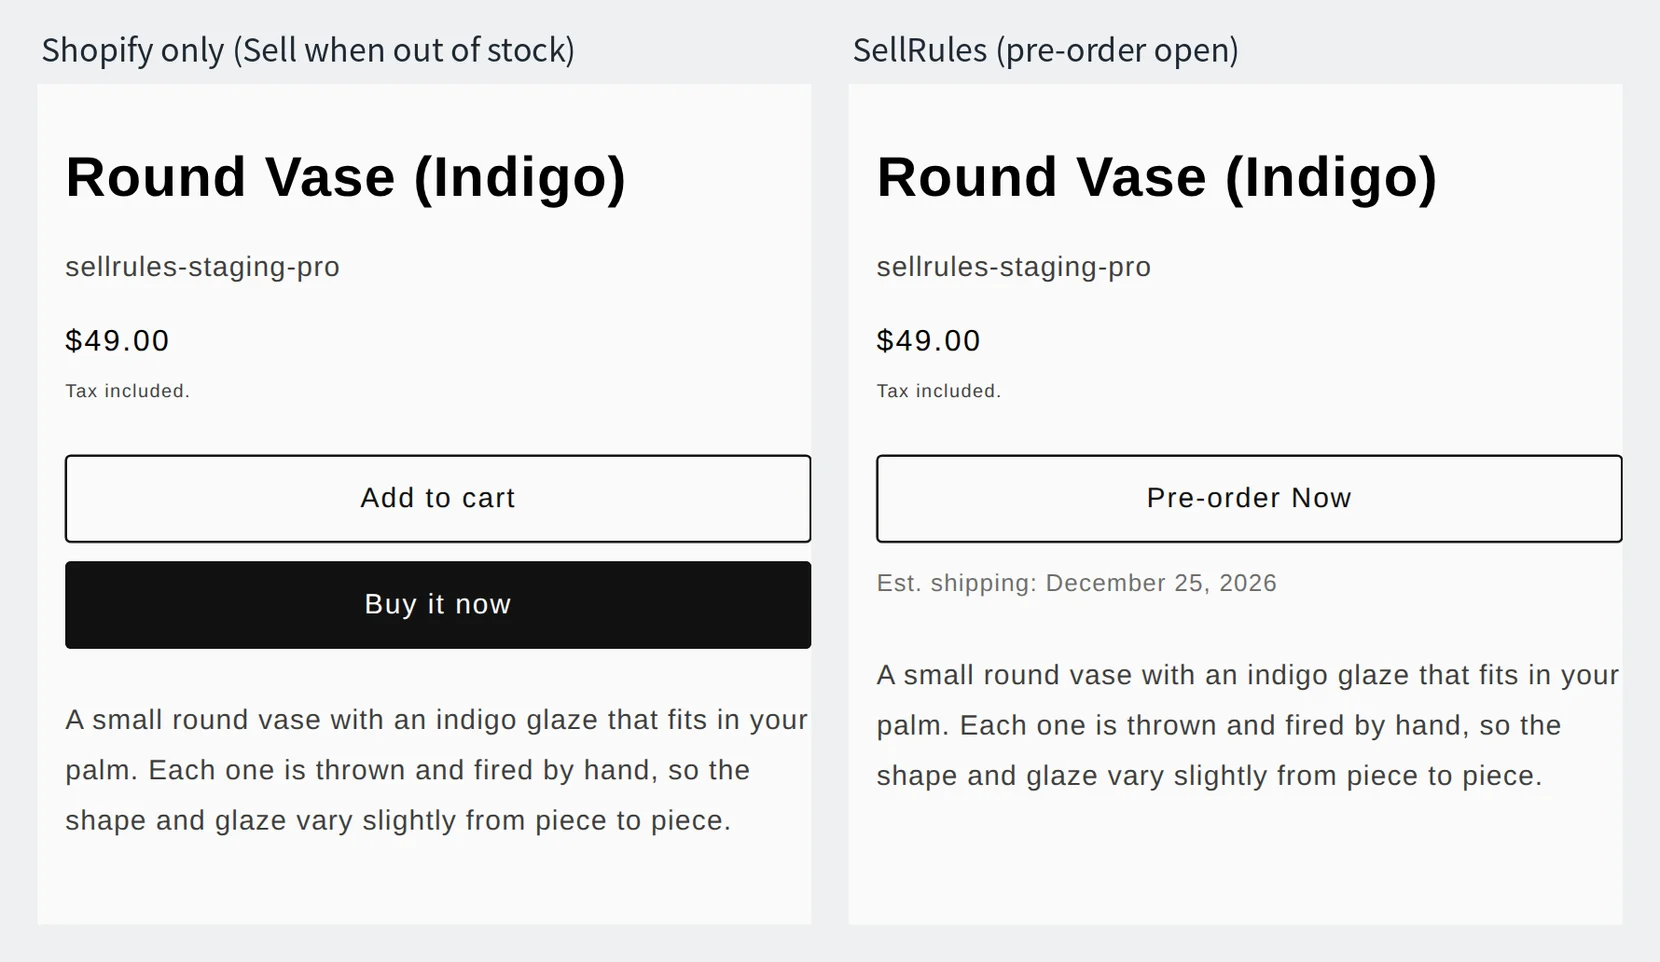
If all you need is to keep taking orders at 0 stock, selecting “Sell when out of stock” on the product's edit page in your Shopify admin is enough. But the product page keeps the regular buy button, so customers can't tell that it's a pre-order or when it will ship.
| What you want to do | Shopify on its own | SellRules |
|---|---|---|
| Show that it's a pre-order | Write it in the product description yourself | The button changes to “Pre-order Now” and the estimated shipping appears |
| Start and stop taking orders at set times | Switch it by hand at that time | Switches automatically at the pre-order start date and the end date and time |
| Cap how many you take | Watch the inventory count and stop sales by hand | Stops taking orders once the “Total quantity limit” is reached |
| Keep pre-order customers informed | Send emails by hand | Automatically sends emails for pre-order confirmation, pre-order start, delays, shipping, and cancellation |
How inventory is handled depends on whether you set a total quantity limit.
- No total quantity limit: While pre-orders are open, SellRules switches the product's inventory setting to “Sell when out of stock”, and switches it back when pre-orders end. You can leave inventory at 0 and still take pre-orders.
- With a total quantity limit: While pre-orders are open, the inventory count in Shopify becomes the number you can still take, and when it reaches 0, Shopify stops sales. When pre-orders end, the original inventory count is restored.
Pick your first product
The best product for your first pre-order is one where you know when you can ship and there's a limit on how many you can take. For example, pottery from your next kiln firing, or a new item with a confirmed arrival date.
On the other hand, if you don't know when a product will come back in, you can't give a ship date for a pre-order. For those products, collecting back-in-stock sign-ups while they're sold out is a better fit (pre-order or waitlist when a product is out of stock).
Don't test on a product that's already selling. Instead, duplicate a product to make a test product, and test it while it's published. An unpublished product can't be opened on your storefront, so you can't check the product page or place a test order.
While pre-orders are open, orders go through even with no stock on hand, so testing directly on a best-seller can bring in orders you didn't intend. When you've finished checking, unpublish or delete the test product.
How to set it up in SellRules
Once SellRules is installed, these steps take you from creating a pre-order on 1 product to checking that it works.
1. Turn on the SellRules app embed in your theme
In Shopify, go to “Online Store → Themes → Edit theme”, turn SellRules on under “App embeds” in the left sidebar, and save. If it stays off, the product page button won't switch even after you enter dates.
2. Create a pre-order and pick a product
In SellRules, go to “Sales schedules” in the left menu, open the “Pre-orders” tab, and click “Create pre-order”. Pick 1 product with “Select product”.
For a product with colors or sizes, choose “Whole product” under “Schedule scope” and every variant gets the same pre-order.
3. Set the start date and what happens when the pre-order ends
In “Pre-order start date”, enter the date and time you want the button to switch to “Pre-order Now”. It's saved in your store's time zone. If you want to check right away on a test product, enter the current date and time.
Next, under “When the pre-order ends”, choose one of these 3 options.
- “Switch to regular sales”: From the date and time you set, the button goes back to your theme's standard buy button. Use this when you'll keep selling the product once it arrives.
- “End sales and show "Sales ended"”: From the date and time you set, the button becomes “Sales ended” and can't be clicked. Use this for a limited item you only make for this round of orders (for how to sell limited items, see planning early-access and limited sales).
- “No deadline (keep taking pre-orders)”: Pre-orders stay open until you stop them yourself.
Only if you want to collect email addresses before pre-orders open, click “Add coming-soon period” and enter a “Coming-soon start date”.
4. Add the shipping estimate and quantity limit, then create
Fill in 2 fields under “Est. shipping”.
- “Estimated shipping (text)”: The timeframe shown on the product page. Write it the way a customer would understand it, such as “Late December”.
- “Estimated ship date”: Enter a date you can meet. If you later move this date past the one customers were given when they ordered, they're sent a delay notice.
If you can only take a set number, click “Show extra settings”, choose “Limited quantity” under “Total quantity limit”, and enter the limit. The number is the total across all variants, and 1 order for 2 items counts as 2. When the limit is reached, pre-orders stop and normal purchasing resumes (if inventory in Shopify is 0, it shows as sold out). For a product with a limit, don't increase inventory in Shopify while pre-orders are open.
Finally, click “Create”.
5. Check the product page and a test order
Once the pre-order start date has passed, open the product page and check that everything matches the table below. If you have a manual payment method (such as bank deposit) turned on, you can choose it to place a test order without charging a card.
| What to check | What it should look like |
|---|---|
| Buy button on the product page | “Pre-order Now”, with “Est. shipping: (your timeframe)” below it |
| Email after you place 1 test order | An email arrives with a subject starting “[Pre-order Received]” |
When you're done, cancel the test order in your Shopify admin. Canceling it also frees up 1 spot in the total quantity limit.
If it doesn't work
| Symptom | Cause | Fix |
|---|---|---|
| Every product still shows the regular buy button | The SellRules app embed is off in your published theme | Turn it on and save, as in step 1 |
| The button hasn't changed to “Pre-order Now” after the pre-order start date | The pre-order start date is in the future, or a different product was selected | Check that product's row and its dates in the “Sales schedules” list |
| The button went back to the regular buy button partway through | The “Total quantity limit” was reached | Raise the limit to start taking pre-orders again |
For other symptoms and fixes, see when the pre-order button isn't showing.
Pricing
Pre-orders are available on the Free plan. On the Free plan, you can take up to 10 pre-order and made-to-order orders in total. The Free plan is enough to create your first product and check how it works.
To take pre-orders with no limit on the number of orders, switch to the Launch plan (US$7.99 per month). The Launch plan also lets you use “Deposit now, balance later (partial payment)”, where you collect only part of the price at checkout (how to take a deposit on Shopify pre-orders).
SellRules plans and pricing
| Monthly price | LaunchEvery feature included | FreeStart with one product |
|---|---|---|
| Monthly price | US$7.99 per month | Free |
| Free trial | 10 days | None |
| Pre-order and made-to-order orders | Unlimited | Up to 10 in total |
| Back-in-stock and sale-start emails (Notify Me) | Unlimited | Up to 15 in total (not refilled monthly) |
| Purchase limits | No limit on products | Up to 1 product |
| Customizable notification emails | Yes | No |
| Deposit payments | Yes | No |
Pre-orders, made-to-order, back-in-stock alerts, purchase limits, stockout switching, deposit payments and order processing are all included in the Launch plan.
The first 10 days of the Launch plan are free. If you remove the app during the trial, you are not charged.
On the Launch plan, back-in-stock and sale-start emails have no sending cap. Required messages such as order confirmations, shipping updates and balance reminders are sent on every plan regardless of the cap.
The Standard and Pro plans are closed to new sign-ups. Shops already on them keep their current terms.
You can install SellRules from the Shopify App Store, where you can also check the pricing and the free trial terms.
Frequently Asked Questions
How do I cancel a pre-order when a customer asks?
Open the order in your Shopify admin, cancel it, and refund it. SellRules picks up the cancellation and emails the customer with a subject starting “[Cancelled]”.
Can I pause pre-orders partway through?
Yes. Open that pre-order in “Sales schedules” and click “Pause sales”. This stops purchases without deleting your settings, so the product page shows “Sales ended” while it's paused. Click “Resume sales” to start taking orders again with the same settings.
What happens when a pre-order and an in-stock item are ordered together?
They go through as 1 order. When a pre-order item and an in-stock item are in the cart together, the cart shows “Your cart contains items with different estimated ship dates. Consider checking out separately if you need items sooner.” Decide ahead of time whether you'll ship everything together or send the in-stock items first.
Related articles:
- If the pre-order button doesn't appear: how to fix a pre-order button that isn't showing
- To collect part of the price at checkout: how to take a deposit on Shopify pre-orders
- To choose an app: how to choose a Shopify pre-order app
The vase and the timeframe are examples for illustration.